
One way to create a sense of depth and visual interest in Photoshop is by adding a drop shadow. This drop shadow is a tool that is capable of enhancing your image to a great extent. It forms a smooth and yet convincing perception of a space between a subject and a backdrop, making it be in the spotlight and feel lively more.
To start adding the shadow to the image or layer, you should select the specific one you want to apply that effect to. Use the layer and start the action by getting hold of the Layer Styles where you will make the changes. You can go to this section by clicking with the right mouse button on the layer, and then choosing “Blending Options” from the menu that pops up, or you can just click on the “FX” icon at the bottom of the panel and choose the control “Drop Shadow.” of Layers.
After the Layer Style window pops up, you can see that shadow effects can be customised with various elements, and your creative power is at its maximum, so the several and several options in the Shadow Glass give you the power to customise the shadow nearly in all ways. Thus, the transparency setting lets you control whether your shadow is strong or almost invisible. If you set the opacity at low, the shadow looks like a light and nearly perceptible one. On the other hand, the higher settings will make the shadow look deeper and more intense.

How shadows work
Shadow occurs when an object blocks the light. That blocked area now gets dark, and the shadow that you see is shaped based on the outline of that object. A shadow may be displayed in any colour distinct from the background, hence either a grey or black graphical representation of these shadows is acceptable. The orientation of an object’s shadows changes with its light source. Shadows change direction and length according to the position and intensity of the light which generates them.
Cast Shadows:
They are the shadows produced when an object gets in the way of a light source and casts its shadow on a background surface. Cast Shadows change in size, shape and governing light source angle and distance.
Form Shadows:
Form shadows are caused by the shape of the object itself, and express the object’s three-dimensionality. These shadows are caused by uneven light on the object where one side of the object opposite to the source of light is darker.

Hard Shadows:
Hard Shadow- Shadows with very clear distinction between where the light did not reach (dark shadow) and areas where it did (brighter object). They are typically created by a direct, powerful light source such as the sun which does not scatter.

Soft Shadows:
- Soft shadows have blurred edges and transition gradually from dark to light. They occur when the light source is diffused or when the object is farther away from the surface where the shadow is cast. Examples include shadows on overcast days or from a softbox in photography.
What Are Photoshop Drop Shadows Used For?
Photoshop drop shadows add depth and realism to images by mimicking the way light casts a shadow behind an object. This effect makes objects look as if they are lifted off the background, giving them a three-dimensional appearance. Designers frequently use drop shadows on text, images, or graphic elements to enhance visual emphasis, distinguish layers, or improve the overall composition of a project. Additionally, these shadows can be tailored by modifying opacity, angle, distance, and blur to achieve various artistic effects.

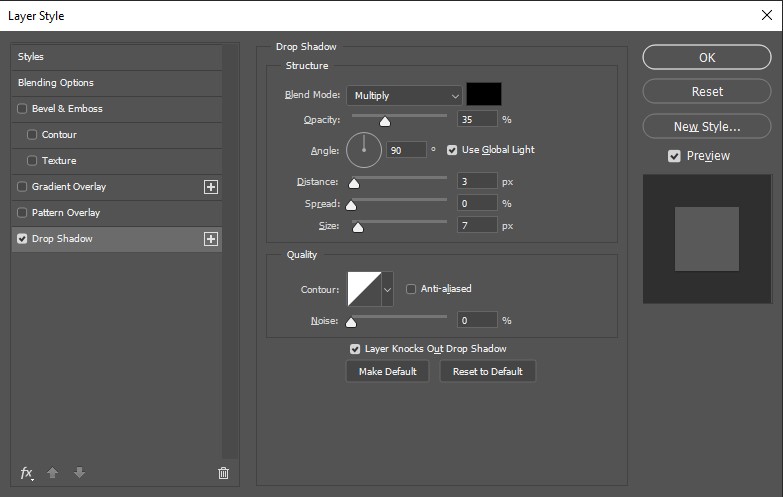
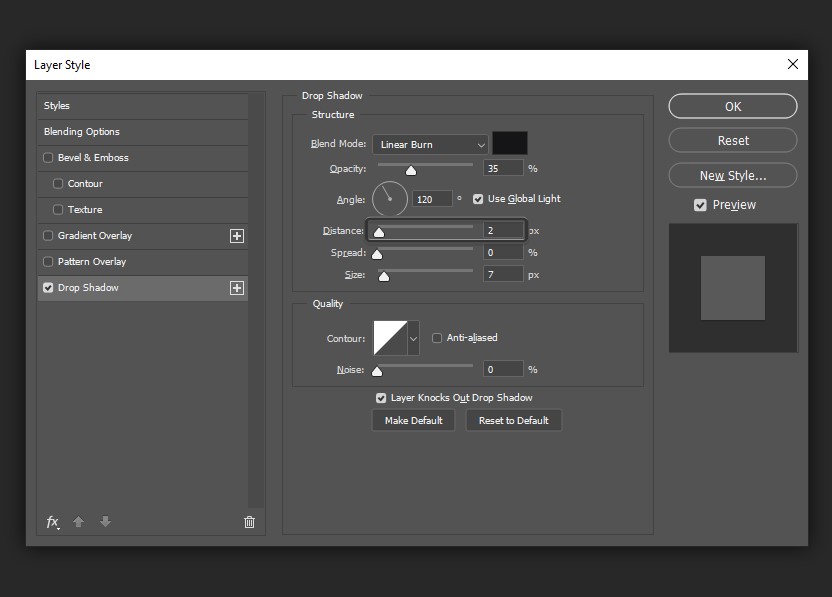
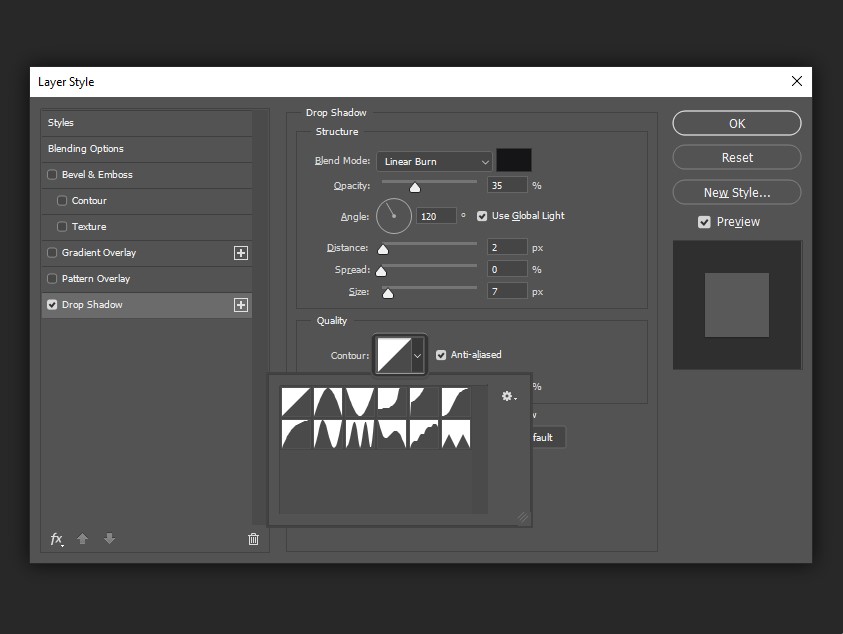
The Layer Styles Drop Shadow Dialog Box
Photoshop provides a robust set of tools for adding and customising drop shadows on any layer. In this dialog box, users can modify important shadow properties like distance, angle, size, and opacity to create the desired effect. The spread and blur controls enable fine-tuning of the shadow’s softness or hardness, allowing for the creation of both subtle and dramatic depth. Furthermore, users can customise the colour and blend modes to achieve specific lighting effects. This dialog box is crucial for enhancing depth, separation, and realism in text, images, or design elements.
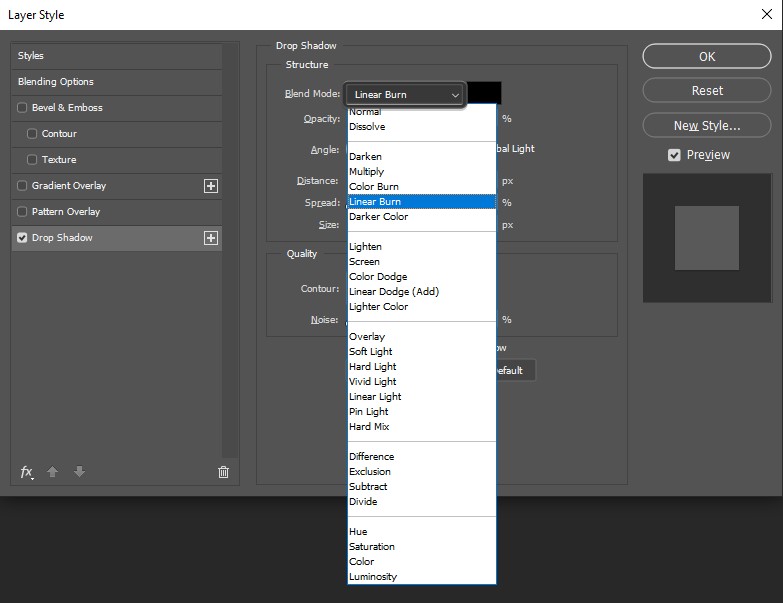
Blend Mode
Photoshop controls how a layer interacts with the layers below it by blending their colours and tones. Each blend mode changes the look of the layer depending on its content and the colours of the layers underneath, allowing for effects like darkening, lightening, or creating overlays. Common blend modes include “Multiply” for darkening, “Screen” for lightening, and “Overlay” for boosting contrast. Blend modes are crucial in photo editing, compositing, and graphic design, allowing for the creative manipulation of layers to create unique visual effects.
Photoshop serves as your ultimate creative tool, allowing you to dynamically merge layers for impressive effects. With blend modes, you can explore countless ways to enhance images, text, and designs—using Multiply to deepen shadows or Screen to brighten highlights. Whether you’re aiming for striking contrasts or gentle overlays, blend modes provide the control needed to make your visuals truly pop.

Photoshop is the key to effortlessly transforming your designs. By adjusting how layers interact, you can create a range of effects, from vibrant overlays to gentle lighting. Whether you use Multiply to enhance shadows, Screen to lighten highlights, or Overlay for striking contrast, blend modes provide limitless creative possibilities. Ideal for photographers, illustrators, and designers, they bring depth, texture, and drama to any project, allowing your images to stand out with just a few clicks.

Opacity
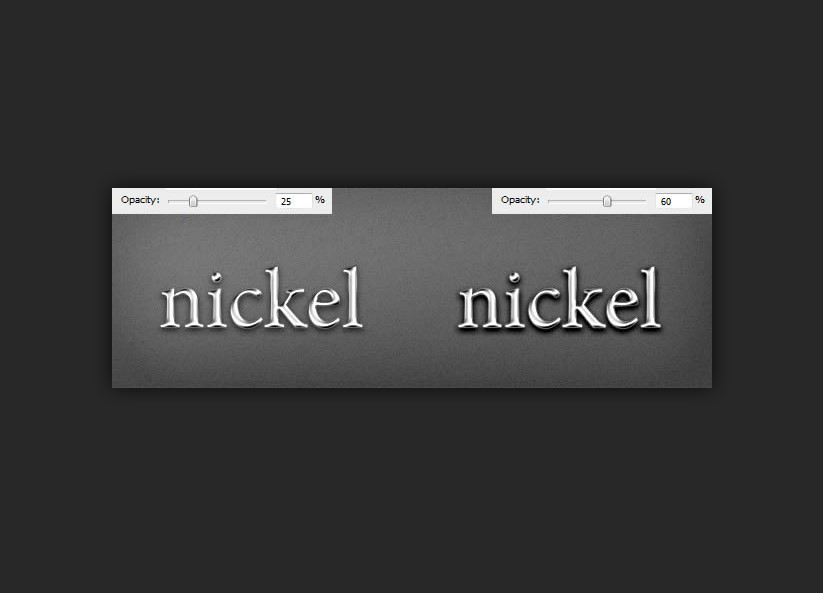
The Opacity slider lets you determine the transparency level of your shadow effect in Photoshop. Setting it to 0% makes it fully transparent, while 100% means it’s entirely opaque.
In this example of Photoshop text drop shadows, you can observe that increasing the opacity from 25% to 60% makes the drop shadow much more noticeable.
Angle
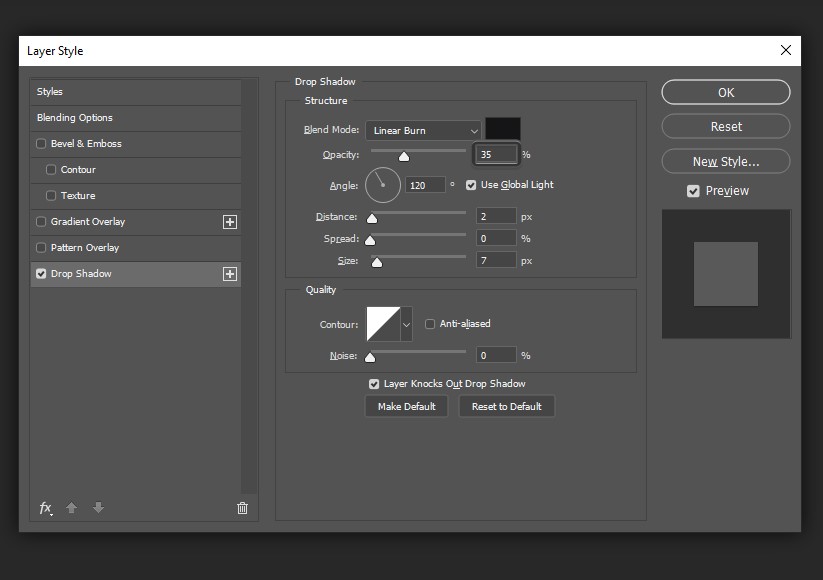
Photoshop involves the way light seems to strike an object, which greatly influences its shadows, highlights, and overall look. By tweaking the angle in layer styles like drop shadows and highlights, you can achieve a more realistic sense of depth and dimension. The angle can change how the object appears, allowing you to mimic various lighting scenarios. For example, a low angle can produce longer shadows, whereas a high angle results in shorter ones. Learning to adjust angles effectively can lead to more engaging and dynamic designs and illustrations.

Optimal configurations or adjustments in Photoshop can greatly enhance image quality, performance, or specific effects. For example, when applying filters or layer styles, certain settings—such as a drop shadow at 120 degrees or a soft opacity level—can lead to a more visually appealing result. Additionally, it’s advisable to use a resolution of 300 DPI for print, RGB colour mode for screens, and PNG for transparency or JPEG for quality. By understanding and utilising these recommended settings, you can significantly improve both your workflow and the final quality of your designs.
Distance
Photoshop involves the spacing between an object and its shadow or other effects, which is essential for adding depth and realism. When you apply a drop shadow or other layer styles, adjusting the distance controls how far the shadow is from the object. A larger distance can create a striking effect, making the object seem to hover above the background, while a smaller distance offers a more subtle, grounded appearance.
Understanding how to master these distance settings can enhance visual clarity, allowing elements to stand out and providing context within the overall composition, ultimately improving how viewers perceive space and form.
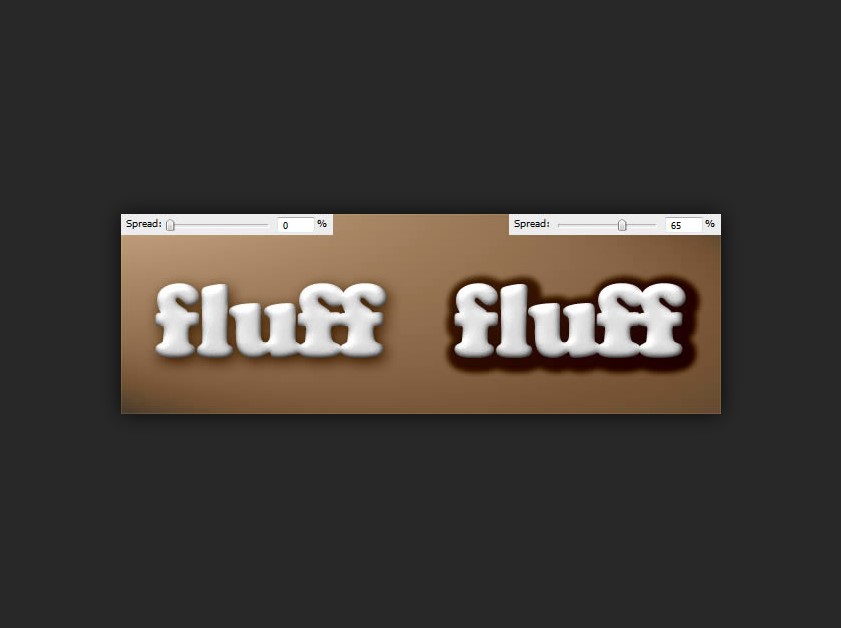
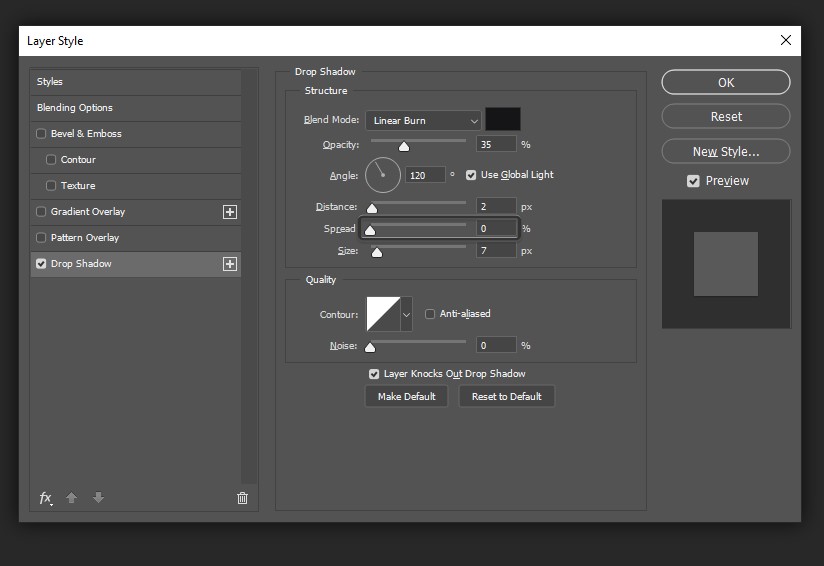
Spread
Photoshop allows you to adjust how much a shadow or layer style extends beyond the object it’s applied to. Increasing the spread value of a drop shadow makes the shadow larger and darker, giving it a more pronounced effect. On the other hand, decreasing the spread tightens the shadow and softens its appearance, leading to a more understated look.

This adjustment is crucial for achieving the desired aesthetic in your design, as it gives you control over the strength and visual presence of shadows. By mastering the spread feature, you can add depth and dimension, making your designs more dynamic and visually appealing.
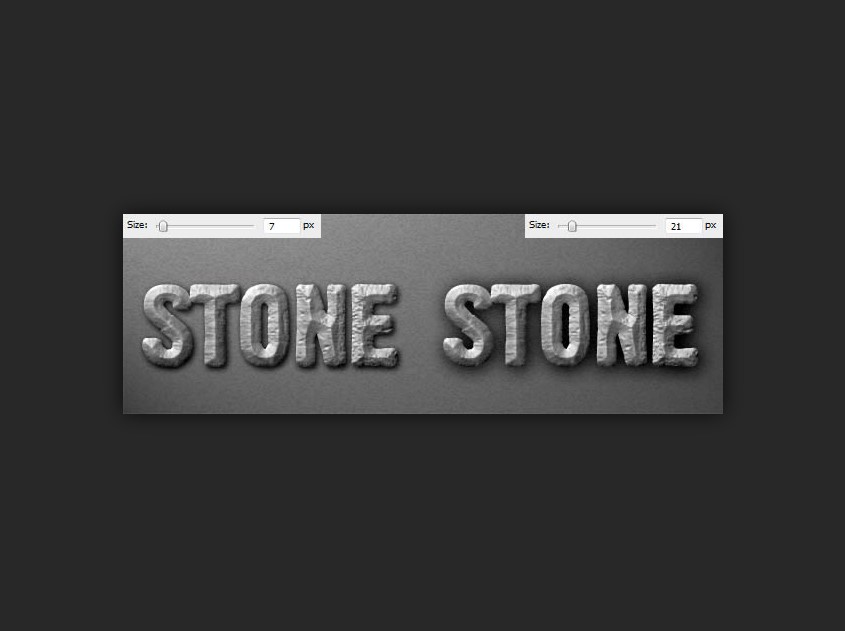
Size
Size in Photoshop refers to the dimensions of a shadow or effect, influencing how soft or hard the edges look. When you adjust the size of a drop shadow, increasing the value results in a more blurred and diffused shadow, creating a softer appearance that resembles natural lighting.
Conversely, a smaller size leads to a sharper, more defined shadow, which can produce a more dramatic effect. This setting is essential for achieving the desired depth and realism in your designs, as it allows you to manage the visual weight of the shadow and its overall effect on the composition, thereby enhancing the overall aesthetic.
Contour
Contour in Photoshop is a customizable curve that changes the shape and distribution of shadows or highlights on a layer. By tweaking the contour settings, you can produce unique and dynamic shadow effects that replicate different light sources, adding depth to your design.
Contours enable you to adjust the transition between light and dark areas, giving you control over the placement of shadows and the emphasis on highlights. This feature is particularly beneficial for creating stylized effects and enhancing the realism of three-dimensional elements in your artwork, making your compositions more visually appealing and engaging.
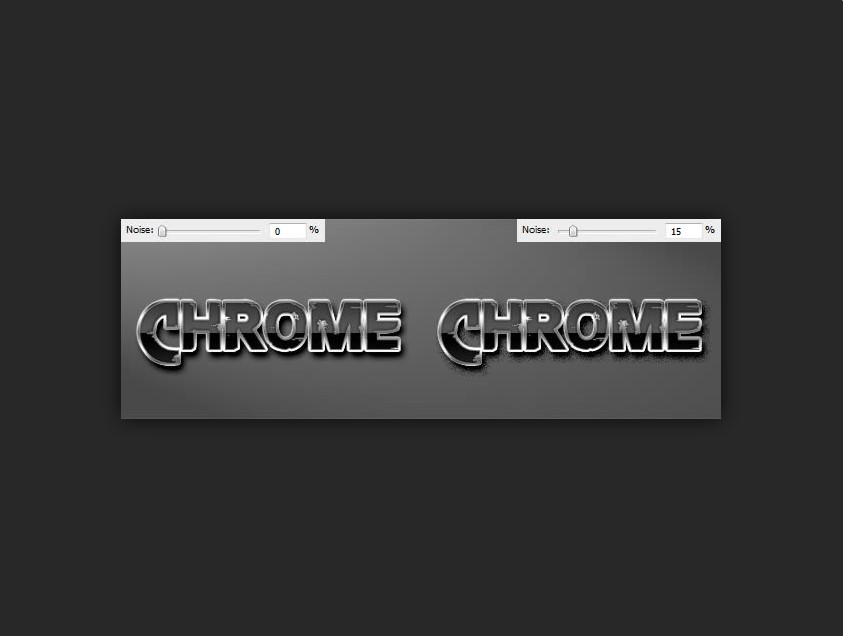
Noise
Noise in Photoshop describes the random fluctuations in color and brightness within an image, which can result in a grainy or textured look. When used in effects like shadows, noise introduces an element of randomness, giving the shadows a more natural and less uniform appearance. This feature is especially beneficial for creating a more

organic feel, mimicking film grain, or adding subtle texture to digital art. By tweaking the noise level, you can improve the depth and realism of your designs, ensuring that shadows blend seamlessly with the overall composition and avoiding an overly smooth or artificial look.
Knock It Out
Knock It Out is a feature in Photoshop that enables you to remove or conceal parts of a layer by using transparency or a mask. This method is commonly employed to achieve cutout effects, where certain sections of an image become transparent, exposing the layers underneath.
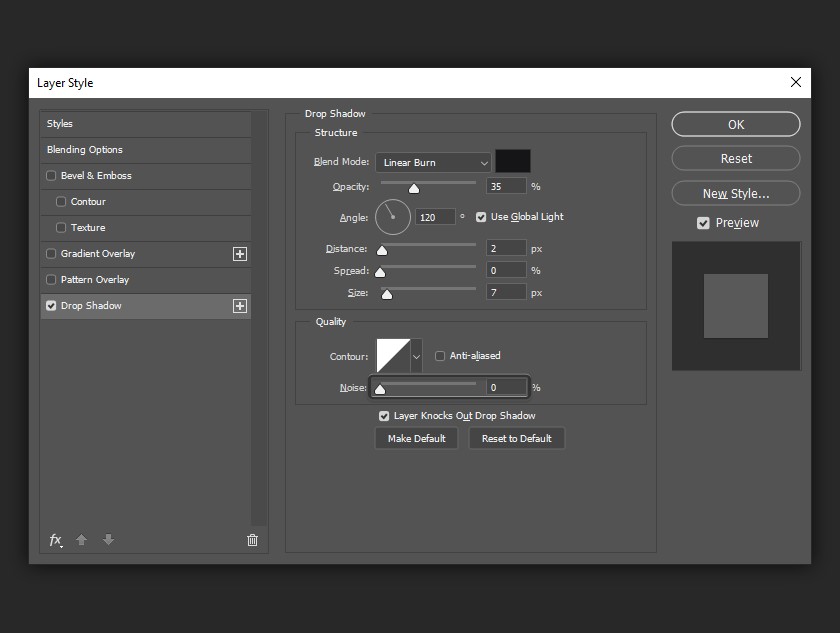
When this technique is applied, the chosen area is “knocked out,” resulting in a clean edge that allows for smooth integration with backgrounds or other design elements. It’s particularly beneficial in graphic design and digital art for creating unique shapes and layouts, adding visual appeal and giving a polished finish to your compositions.
How to Save and Load the Default Settings
You can save and load default settings for each effect in the Layer Styles dialog box. By clicking “Make Default,” Photoshop will save the current active settings as the new default for that effect.

If you choose “Reset to Default,” Photoshop will revert to the last saved settings. This feature lets you experiment freely and easily reload your custom default settings if you decide to start fresh.
Premium Photoshop Shadow Effect Assets From Envato Elements
offer a wide range of high-quality resources aimed at enhancing your designs with beautiful shadow effects. These resources feature pre-made shadow overlays, customizable layer styles, and mockup templates that enable you to achieve professional results quickly and easily. With a vast collection of textures, brushes, and vector graphics, Envato Elements helps you add depth and dimension to your projects, whether for branding, marketing, or personal art. By subscribing, you gain unlimited downloads, opening up endless creative opportunities while streamlining your design process. This is ideal for graphic designers, photographers, and digital artists who want to elevate their work with elegant shadow effects.
Final thoughts
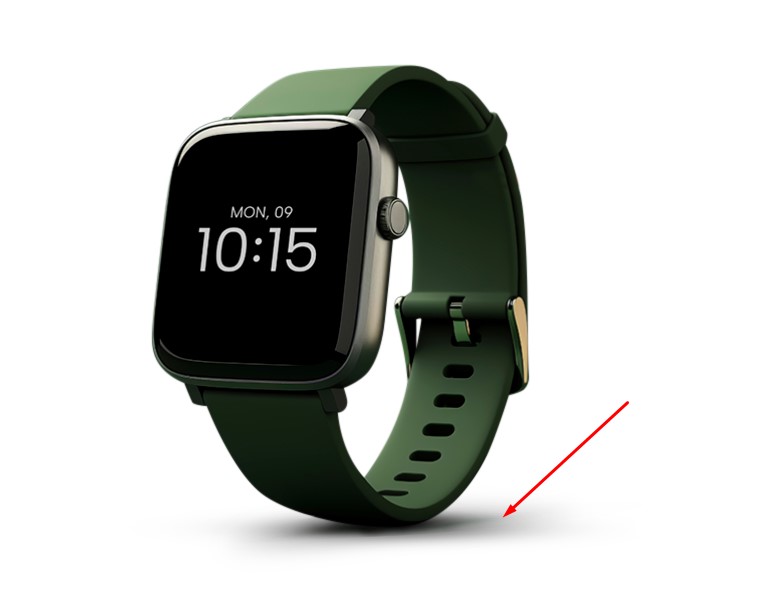
To manage a successful e-commerce business, budgeting is a must. Choosing a photographer to shoot product photos in a studio entails a large amount of money. Instead, you could easily crop the background out of your photos and use a drop shadow effect.
During editing, be sure to include a shadow in your photos with the use of Photoshop. This is in a way, enhancing objects giving them a more 3D dimension, thus, creating a more amusing and vibrant experience. Also, this technique can also make your photos look as if you had taken them in real life.
The process of adding drop shadows in the art of editing double ups your photos and brings your expertise to the next level, regardless of whether you are a professional photographer or a hobbyist. With the correct techniques and precision, you are capable of producing attractive, hard-hitting visuals that lure people in and lift your brand head and shoulders above the rest.